Description
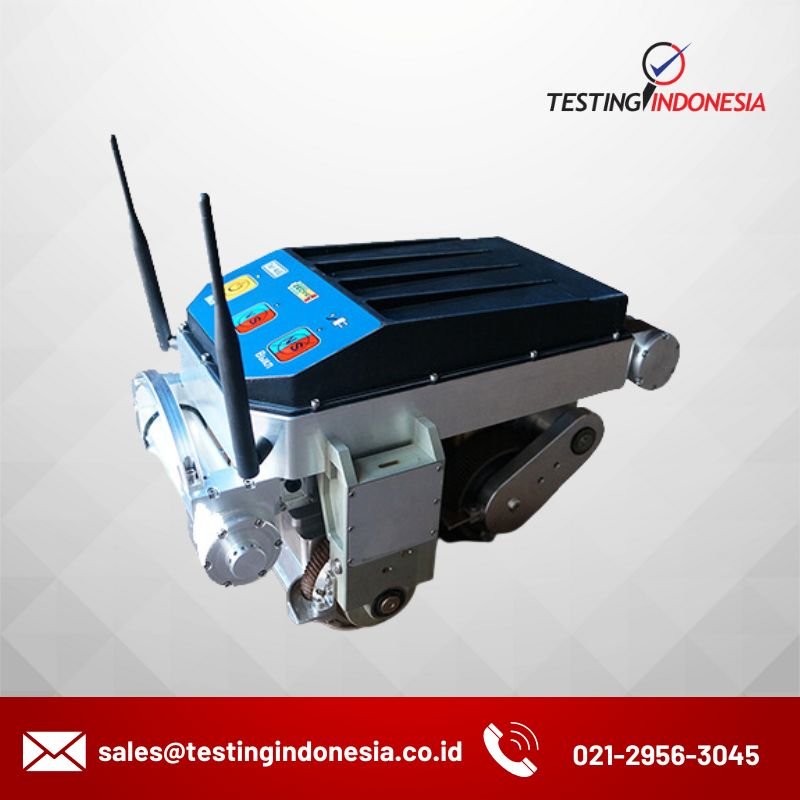
The scanner can be inserted through the available manhole hatches, spark plug lines starting from DN 300 mm, access holes 320х240 mm.
In-line inspection of pipelines is provided without additional clean-up operations, at that the scanner moves in a path along the pipe passing-by the contaminated areas.
Inspection of base metal and welded joints of the pipeline elements using a television-optical system (visual and dimensional inspection) and antenna arrays with acoustic transducers with dry point contact (guided wave ultrasonic inspection, shear horizontal wave; SH wave).
Ultrasonic inspection unit is based on ultrasonic transducers with dry point contact (DPC) allowing transmitting and receiving of ultrasonic waves in the wall of pipe without contact liquid – only by means of friction between the ceramic protector of the transducer and metal surface.
A set of 32 DPC transducers forms an antenna array (AA) phased in the desired direction and shaping guided ultrasonic waves in the wall of pipe. Frequency range is from 20 to 80 kHz (search for flaws with a height of more than 10% of thickness of the wall of pipe, effective inspection length is up to 4 000 mm).
Television-optical system of the scanner provides in-process visual examination during in-line inspection.
Television-optical system includes an HD camera with a 5 megapixel matrix and a camera lens with 180 degree pickup angle, two LED spotlights and sweep drive of the module in a vertical plane.
Video bit rate considering radio link capacity is up to 20 frames per second. It provides potential efficiency of visual examination up to 5 linear meters per minute.
This module as well includes a methane concentration measuring sensor and a projective laser.
The scanner bears two similar television-optical system units – in front and back of the body. The operator selects the scanning direction. The second camera is required for reverse movement of the scanner in the small diameter pipes (is less than DN 500 mm) where the scanner cannot be turned.
The scanner moves along the arbitrary path by means of magnetic motor-wheeled modules.
Magnetic module is based on the rare earth magnet with high residual induction magnetic.
Pull-off force of the magnetic motor-wheeled module from the ferromagnetic surface – 600 N (60 kilogram-force).
Hall sensors are built-in into the module. They sense the magnetic field intensity of the «wheel-surface» contour allowing registration of the wheel breakaway torque from the ferromagnetic surface.
3-axis microelectromechanical systems tilt meter built-in into the motor-wheeled module registers angle position of each module (measurement accuracy ± 0.1 degree) thus allowing implementation of the route location function of the passed area of the IP CS (3D-topology) and control over movement of the scanner in automatic mode.
Design of the power driven platform allows movement of the scanner inside the IP CS along the various elements (pipes, elbows, T-joints, diminishing pipes, shutoff and control valves) DN 300-1400 mm.
A transport platform is based on the 2-axis scheme allowing travel procedures of the T-joints, obstacle avoidance, movement along an arbitrary path.


