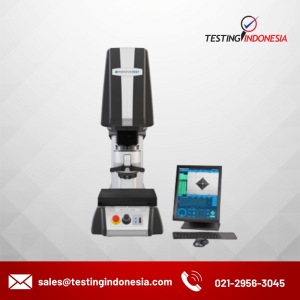
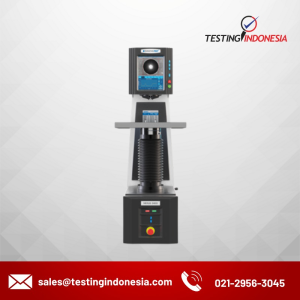
V3.0 Micro Vickers / Vickers Hardness Automatic Measuring System
V3.0 Automatic Vickers Hardness Measuring System is integrated with several new technologies such as optical imaging, mechanical displacement, electronic control, digital imaging, image analysis, computer processing and so on.
Features
System linkage: Through the communication interface it realizes the linkage between the system and the hardness tester.
● Pressure linkage: When converting test force, the system percepts the test force change and displays in real time.
● Turret linkage: The software controls the shifting between the objective and the indenter without manual control.
● Loading linkage: The software controls the loading without manual control.
● Measuring linkage: The software controls the turret, loading and directly reading the Vickers hardness value.
● Light source linkage: Automatic focus.
● Image acquisition: Real time display of hardness image, store and print image.
● Automatic measurement: Automatically find the four vertices of indentation with fast speed and accurate data, there are many professional algorithms to be suitable for different indentation. It continuously and immediately measures at specified coordinates once loading.
● Automatic point search: The system automatically finds the best vertices near the four vertices of the indentation, greatly reduce the human error.
● Diagonal measurement: Click the top left and lower right corner of the indentation, you can read the hardness value.
● Four point measurement: Click the four point of the indentation and you can read the hardness value.
● Hardness conversion: According to the national standard, automatically convert the hardness value between Brinell, Rockwell, Vickers, Knoop, real-time display.
● Graphic report: Automatic record of measurement data, automatic generation of hardness-depth curves, saving or printing the hardness-depth curves and all indentation measurements.Save or print the indentation image and the current indentation hardness value.All the reports are saved in WORD file.
● Results statistics: Output the multiple measured results of indentations by EXCEL and automatically count the measurement number, maximum value, minimum value, average value, variance, etc. of hardness.
● Linkage control:Through the communication interface the system percepts the test force changes, controls the turret, loads and directly reads.
● Automatic displacement: Equipped with high precision X-Y automatic test table.
● Automatic identification: Leading indentation automatic identification technology, read D1 / D2 and HV value in 0.3 seconds.
● Stable performance: The indentation of non mirror polishing, uneven light, not in the center can be read automatically.
● Powerful functions: Such as manual reading, automatic reading, hardness conversion, depth-hardness curve, indentation image, picture and text report.
● Easy to use: Through the hardness block calibration, in line with the users’ habits. It can be normal used with half day training.
● Automatic reading: Original algorithm of automatic reading to automatic read a variety of indentation with fast speed and high accuracy.
● Good repeatability: It is automatic reading with high repeatability and can satisfy the requirement of professional users.
● Automatic scanning: Can automatically scan the sample edge and shape.
Spesification
1. Computer (2G memory, 500G hard disk, 19 inch LCD screen)
2. Ink jet printer
3. Operating system: WIN XP、WIN7
4. Digital imaging system
High resolution: 130 million pixel(1280×1024)
High speed acquisition: 1280×1024 resolution: 25 FPS
High definition: Black and white images and clarity is better.
Target surface size: 1/2 inch
5. X-Y automatic test table
Table size: 110×110×50 mm
Maximum travel: 50×50 mm
Minimum step: Less than 2μm
Movement speed: Adjustable
Control mode: Manual control, electric control, computer control
6. X-Y test table - computer control mode
Location movement: The test table directly moves to the software settings;
Point movement: Select any point of the sample, moved to the below of the indenter;
Directional movement: Click the eight directions to make the test table move and the moving step can be set up;
Arbitrary movement: Click any directions to make the test table move and make it easy for users to browse the specimen surface;
Variable speed movement: There are two speeds (fast and slow) when moving the test table and the speed is optional and adjustable;
Other function: Original position arbitrary setting, automatic reset, mechanical limit, and other professional features to meet various requirements.
7. Measuring method
Automatic mode——Automatic test table moving (X, Y, Z direction) + automatic reading
Manual mode 1——Automatic loading + manual eyepiece scribed line measurement
Manual mode 2——Manual test table moving + manual focus + Automatic / manual measurement
8. Automatic / manual reading
Automatic reading time: Single indentation reading time is about 300 milliseconds;
Automatic measurement precision: 0.1μm;
Automatic measurement repeatability: ±0.8%
Manual reading: Manual pick, automatic search points, 4 points measurement, 2 diagonal measurement
9. Results save / output
Save / output measurement data and experimental parameters, including D1,D2,HV,X,Y etc.;
Save / output effective hardening layer depth curve report;
Save / output image.


Reviews
There are no reviews yet.