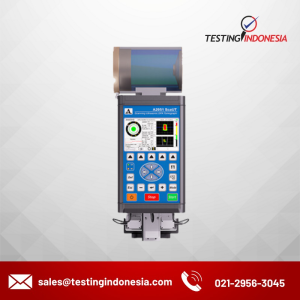
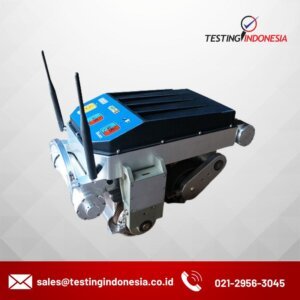
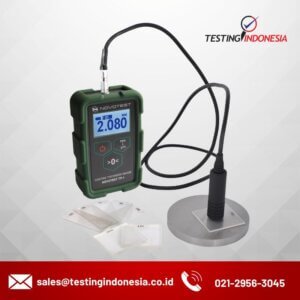
A2075 SoNet

Description

Noncontact ultrasonic scanner-flaw detector А2075 SoNet is applicable for automatic flaws search in the metal pipe’s walls of 1020 ÷ 1420 mm in diameter and with thickness starting from 6mm.

Operating principle of the scanner- flaw detector is a wave guided pulse echo inspection technique excitation (sending) and receiving of ultrasonic waves in a pipe’s body is made without a contact (without using a couplant) with a help of electro-magnetic acoustic (EMA) transducers.

Detection of a stress-corrosion and corrosion flaws in the pipe’s body. Detection of flaws in flats (sheet products) with indication of flaw’s quantity, relative dimensions and locations (coordinates).

Wi-Fi connection between the PC and the scanner-flaw detector provides a great mobility and the possibility for the operator to conduct testing remotely.

An image of a pipe section is made right during the scanning that helps to estimate the flaws found and helps to decide if an additional inspection with the other NDT methods is necessary.

Continuing documentation of the results as a scanning image of the pipe.

Efficient review of the collected scan images in the screen of the Notebook.

Post-processing of the scan images along with recording of the location, orientation and the type of the flaws.
Time required to set up the instrument and start inspection is just 3 minutes.

The possibility to upload the data from intratubal inspection and attach it to the main report.

Block structure of the instrument makes it possible to promptly replace a broken blocks on-the-site by only one operator.

Portability – the scanner – flaw detector can be carried by 2 people and can be operated by 1 user.


Spesification

Velocity3020 m/s
Operating frequency0.5 MHz
Range of the calibrated amplifier0-40 dB
Limit of the acceptable basic absolute accuracy in measuring of the coordinates of the flaws along the circumference of the pipe, not more than±100 mm
Limit of the acceptable basic absolute accuracy in measuring of the coordinates of the flaws towards the pipe, not more than±20 mm
Maximum sensitivity of the receiver, not less than20 mKV
Measurement accuracy of the amplitude ratio of signals at the receiver input, not more than±1 dB
PowerAccumulator blocks
Voltage12 V
Operating time (accumulator)8 h
Weight42 kg
Average error-free running time30000 hours
Average lifetime, not less than4 years
Operation conditions: air temperaturefrom -40 to +50°C
relative air humidity at a temperature of +35 °С, not more than95%
Dimensions407 х 655 х 407 mm

Applications

Mainly the instrument is used as a part of flaw detection sets. Such flaw detection sets are used for searching flaws in gas pipelines, oil pipelines and products pipe line during major repairs or during the construction process. Scanner-flaw detector А2075 SoNet is able to successfully detect both types of flaws: stress-corrosion flaws and other surface or internal flaws of the pipe. The inspection is conducted by an inline automatic moving of the inspecting part of a flaw detector along generatrix on the external surface of a pipe. During the inspection full circle flaw detection is held. An image of a pipe section is made right during the scanning that helps to estimate the flaws found, to plot the coordinates, to estimate their type and shape, using standard tools of nondestructive testing. Productivity – up to 7 meters of pipe per minute. High sensitivity – detection stress-corrosion flaws and corrosion from 1mm. Scanner flaw-detection is able to work on the pipe that has been earlier shelled from the old isolation. The scanner ensures 100% recurrence of the data.

List of Spare Part and Tools

• Inductor of the electro-magnetic acoustic transducer (3 items) • General-purpose tester • Cross screwdriver • Flat-blade screwdriver • Set of allen keys • Allen key for the encoder

Additionally

• Charging unit with cable for accumulator unit of (RTU) • Accumulator for PC • Field magnet of the electro-magnetic acoustic transducer

Delivery Kit

• PC-Panasonic Toughbook CF-U1 • Charging unit with cable for PC • Receiver-transmitter unit (RTU) • Transfer platform • Block of the electro-magnetic acoustic transducer • Transportation packing for scanning device • Transportation packing for RTU, PC and spare parts • Passport (can be sent by e-mail) • Operation manual (can be sent by e-mail) • The standard (technique) of ultrasonic testing of a pipe’s base metal with the non-contact ultrasonic scanner-flaw detector A2075 SoNet (can be sent by e-mail) • CD with the documents and Software( items can be sent by e-mail)

Reviews

There are no reviews yet.

Be the first to review “A2075 SoNet”

Your email address will not be published. Required fields are marked *